Building a Home Cybersecurity Lab
The goal of this post is to set up a safe environment to practice cybersecurity skills on self-hosted virtual machines. This setup allows you to safely explore real-world vulnerabilities without risking any external systems.
Prerequisites
- VirtualBox
- 8+ GB of RAM
- Good internet connection
Architecture
We will set up two virtual machines in this lab:
- Attack machine
- Target machine
- Virtual network to connect the two machines
Attack Machine — Kali Linux
Kali Linux is an open-source, Debian-based Linux distribution geared towards various information security tasks, such as Penetration Testing, Security Research, Computer Forensics and Reverse Engineering.
Kali Linux is the industry standard that comes pre-loaded with almost all the tools we need.
Step 1: Download the Image
Download the VirtualBox image from the Kali Linux site and extract it.
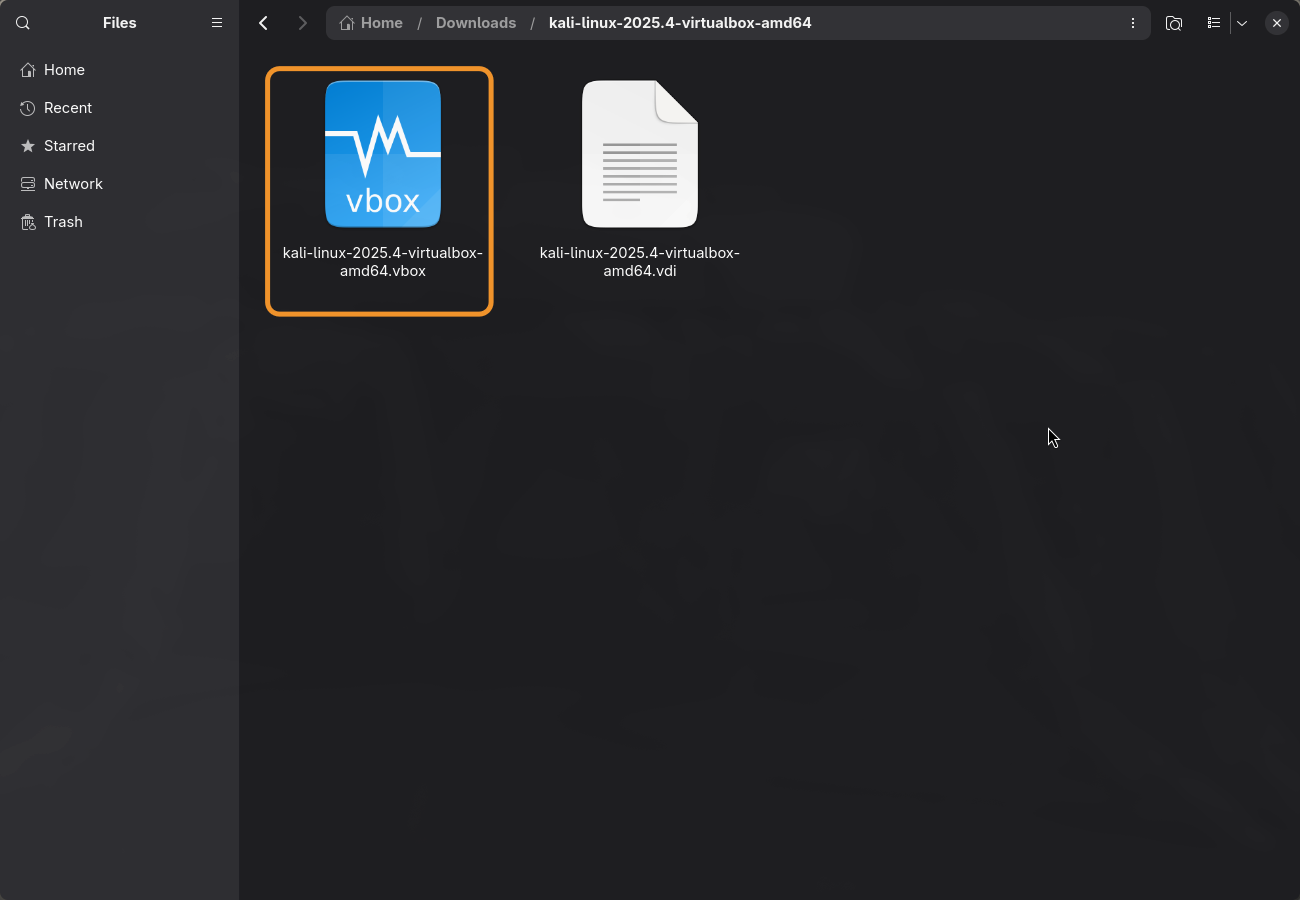 Figure: Extracted Kali Linux VirtualBox image files
Step 2: Import the Machine
Open VirtualBox, click Open, navigate to the downloaded .vbox file, and open it.
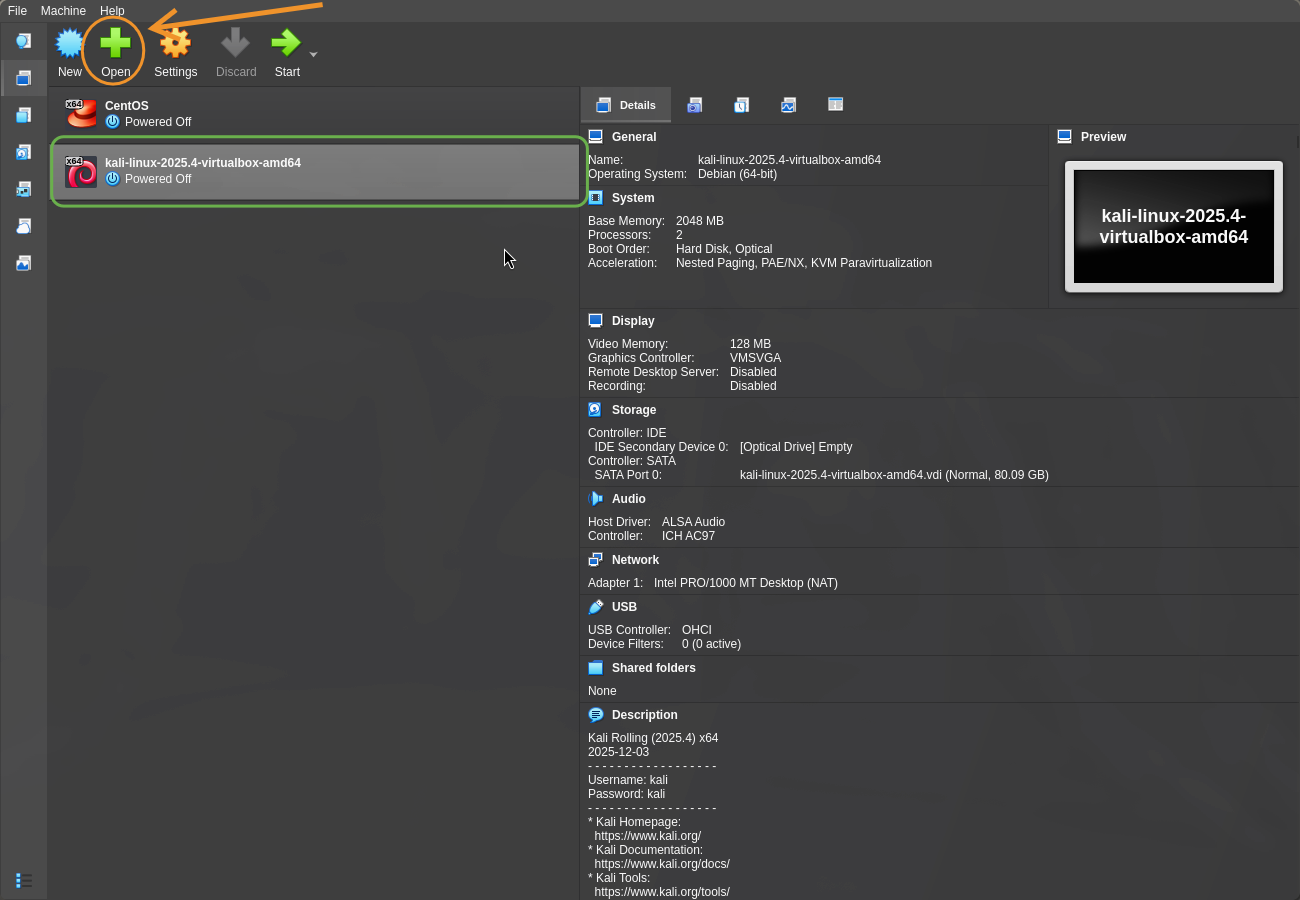 Figure: Importing the Kali VM into VirtualBox
Step 3: Launch Kali
Start the VM. Kali Linux will load and prompt for login credentials. Use the defaults:
username: kali
password: kali
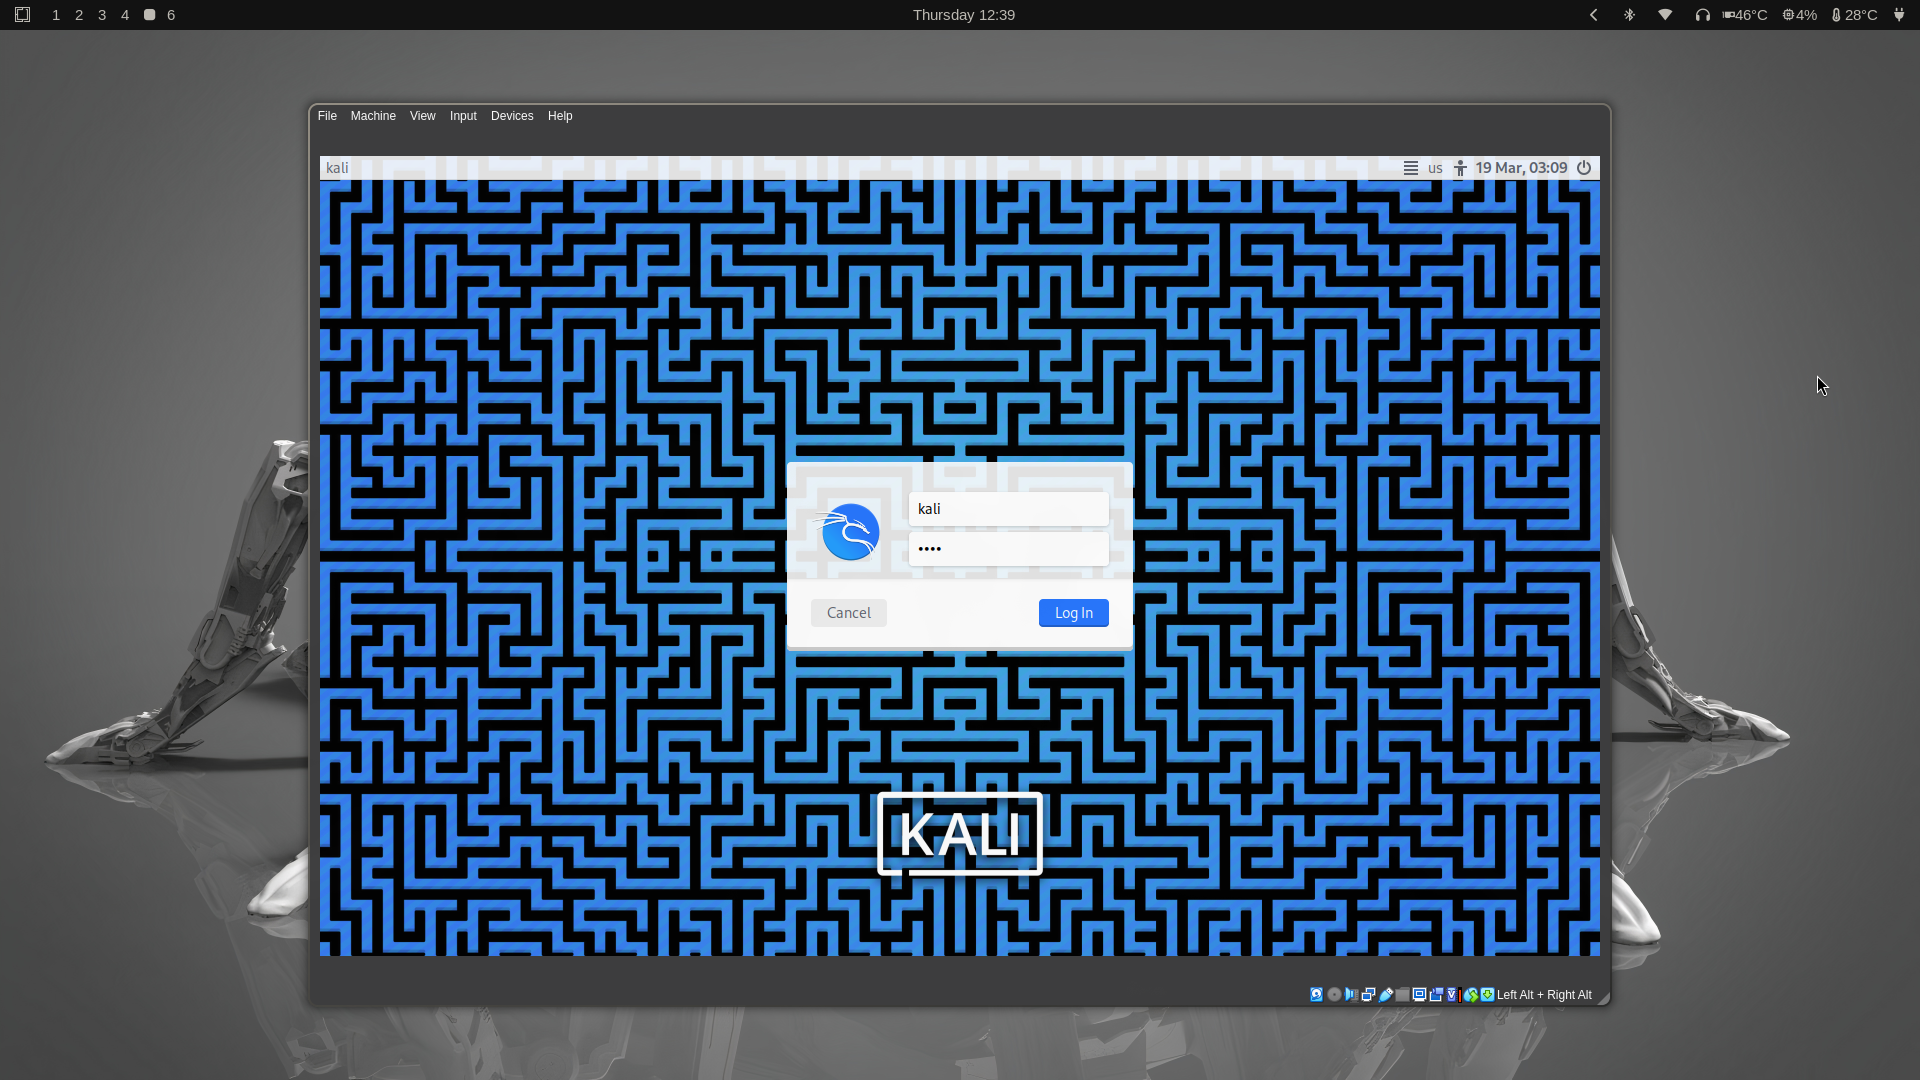 Figure: Default Kali Linux login screen
Target Machine — Metasploitable 2
A test environment provides a secure place to perform penetration testing and security research.
Metasploitable 2 comes with vulnerabilities baked in for practice. It's from the team behind the Metasploit Framework (the software responsible for mass-producing script kiddies).
Step 1: Download the Files
Download Metasploitable 2 from the website and extract the zip file.
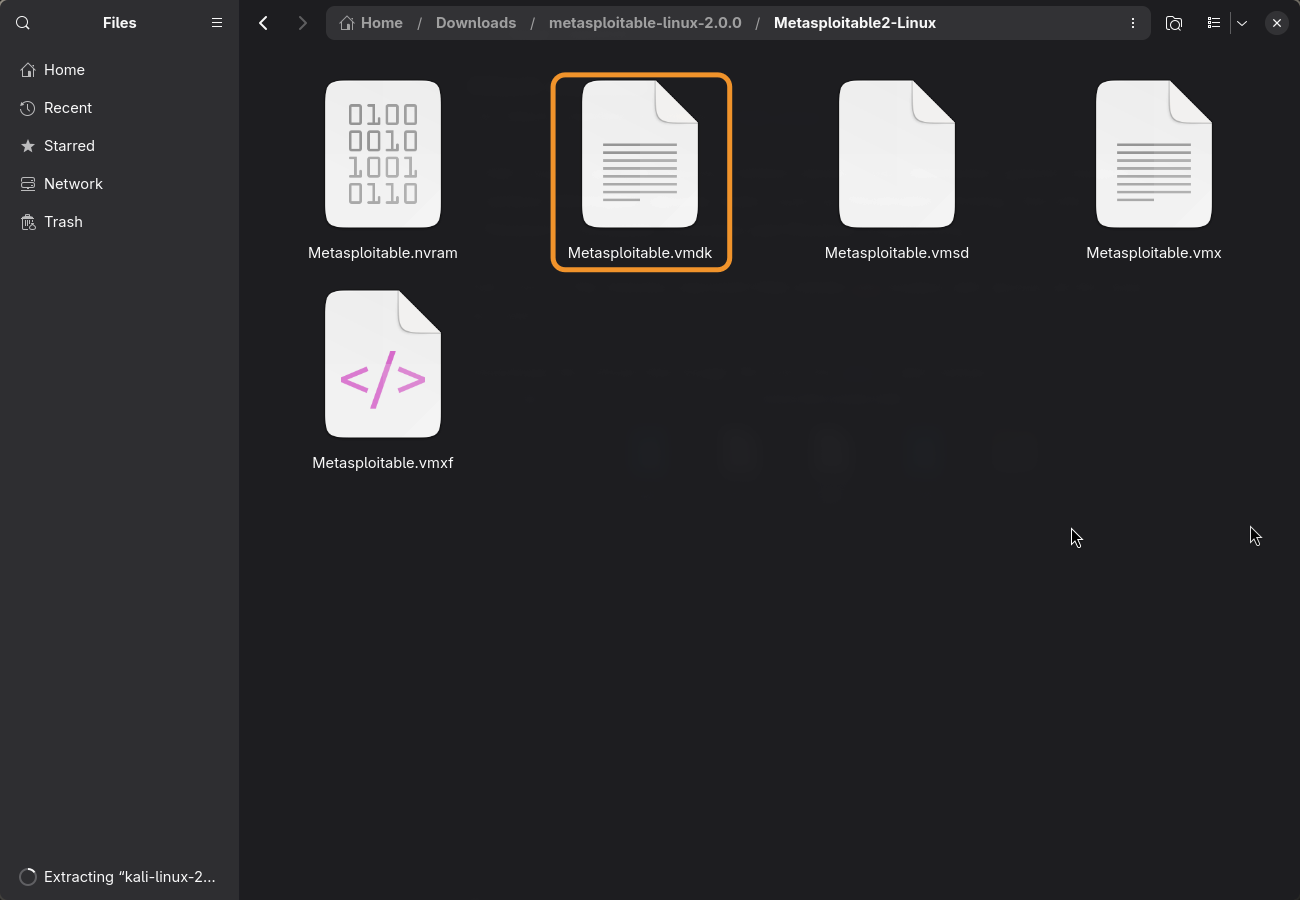 Figure: Metasploitable 2 download page
Unlike Kali Linux, Metasploitable 2 doesn't include a default VirtualBox configuration — we have to manually import the virtual disk.
Step 2: Create a New VM
In VirtualBox, create a new machine with the following configuration:
Name:    Metasploitable
Type:    Linux
Version: Ubuntu (32-bit)
Allocate appropriate RAM and CPU resources.
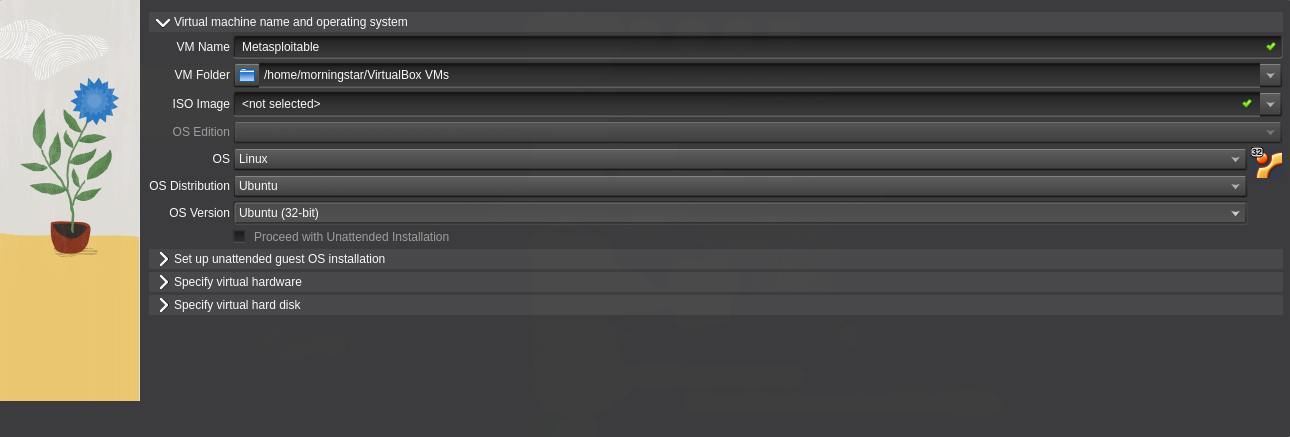 Figure: VM configuration for Metasploitable 2
Step 3: Attach the Virtual Hard Disk
Go to Specify Virtual Hard Disk, click Add, and navigate to the extracted .vmdk file to select it.
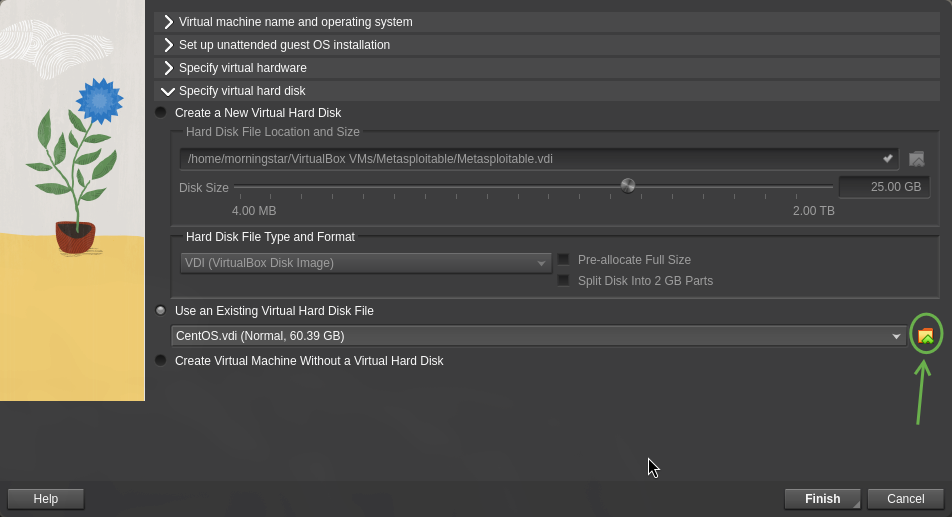 Figure: Specifying the virtual hard disk
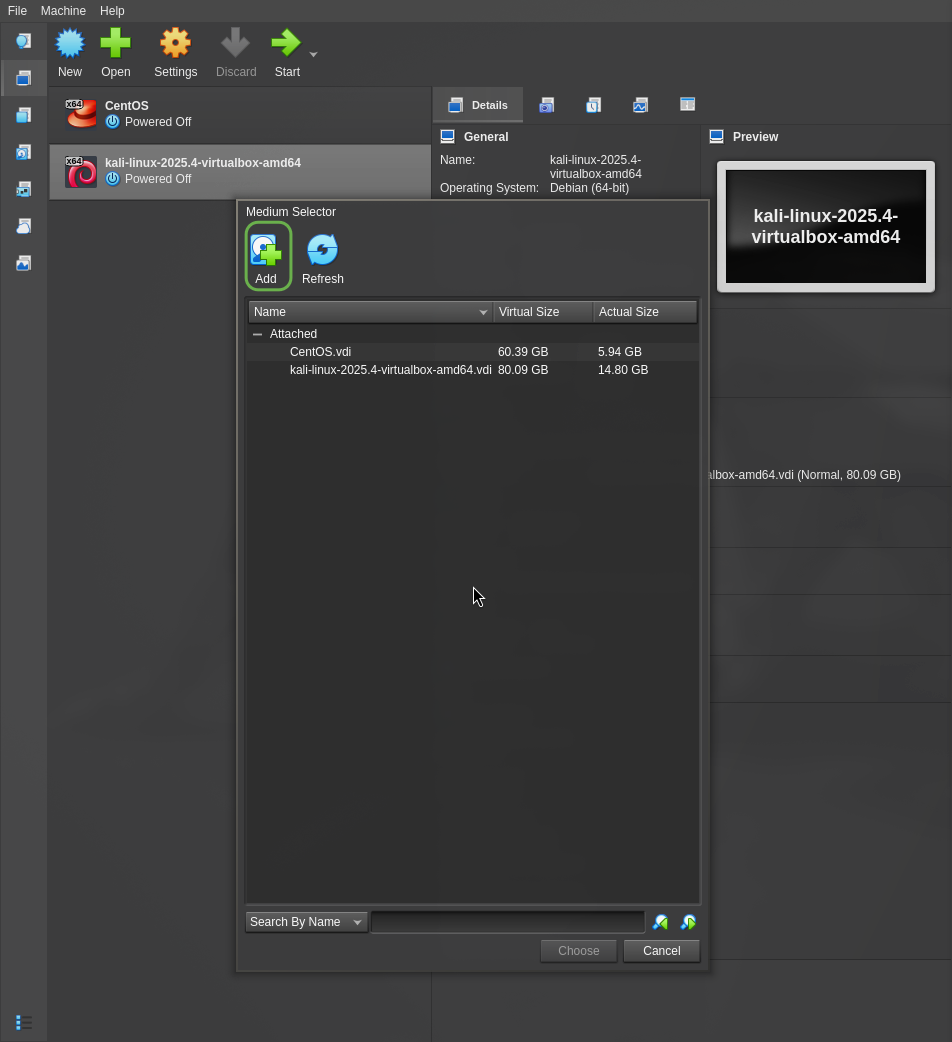 Figure: Adding the .vmdk disk file
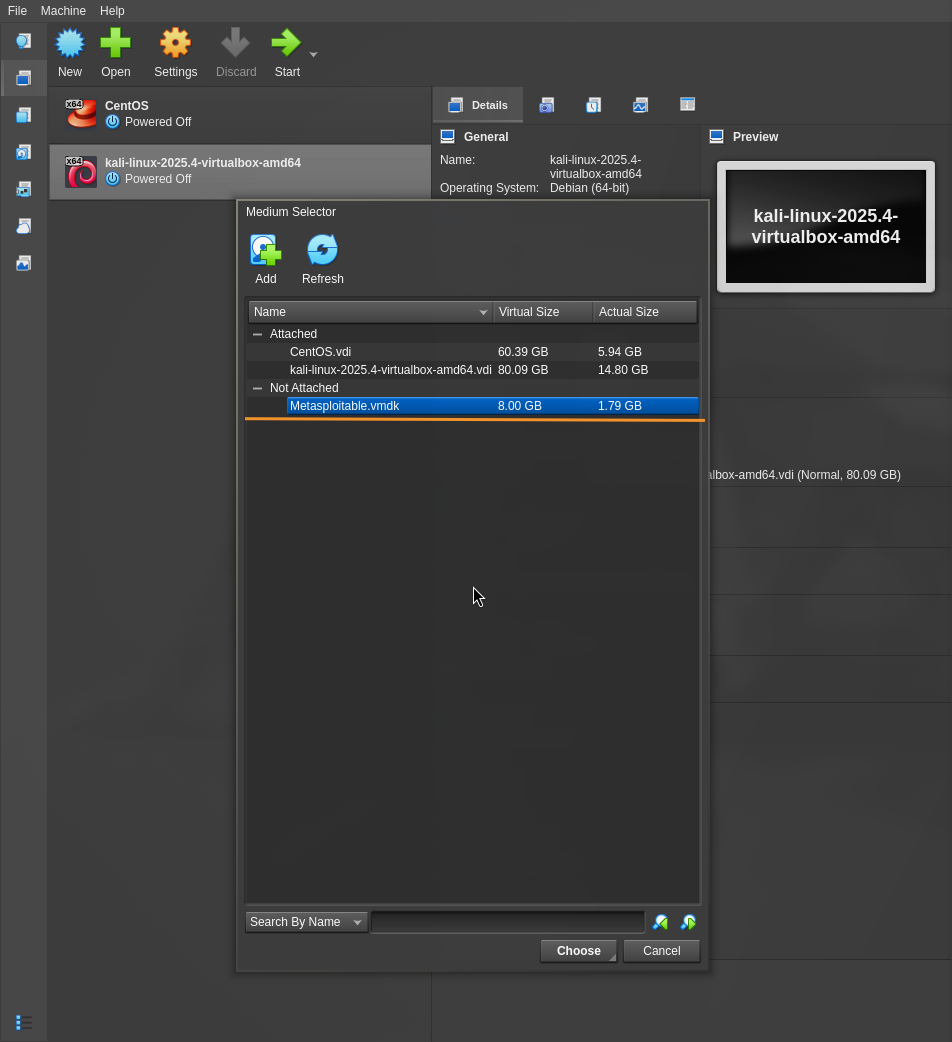 Figure: Selecting the disk file from the folder
Click Choose, then Finish.
Step 4: Launch Metasploitable
Start the machine. Use the default credentials:
username: msfadmin
password: msfadmin
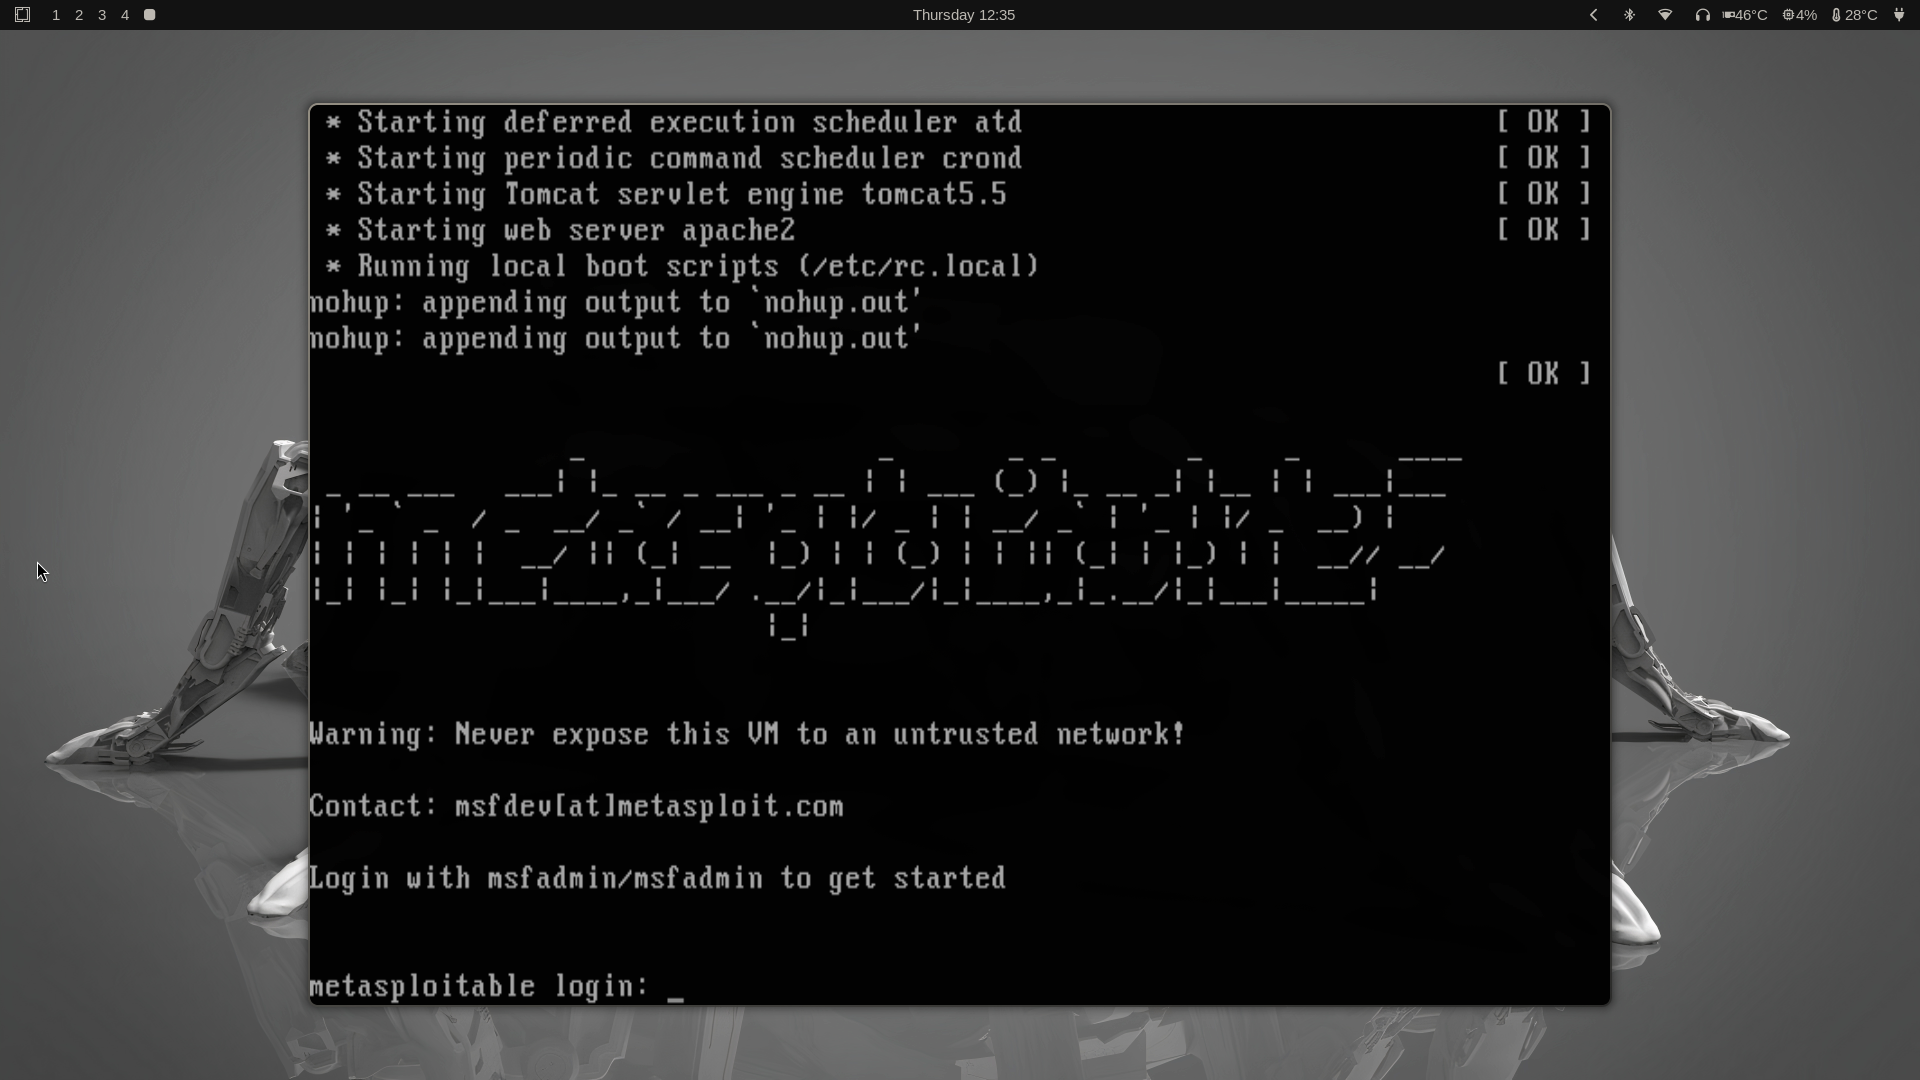 Figure: Metasploitable 2 booted successfully
Virtual Network
The two machines are running as separate instances and can't communicate yet. We need to create a host-only virtual network between them — a feature built into VirtualBox.
Step 1: Create the Network
From the home screen, go to File → Tools → Network.
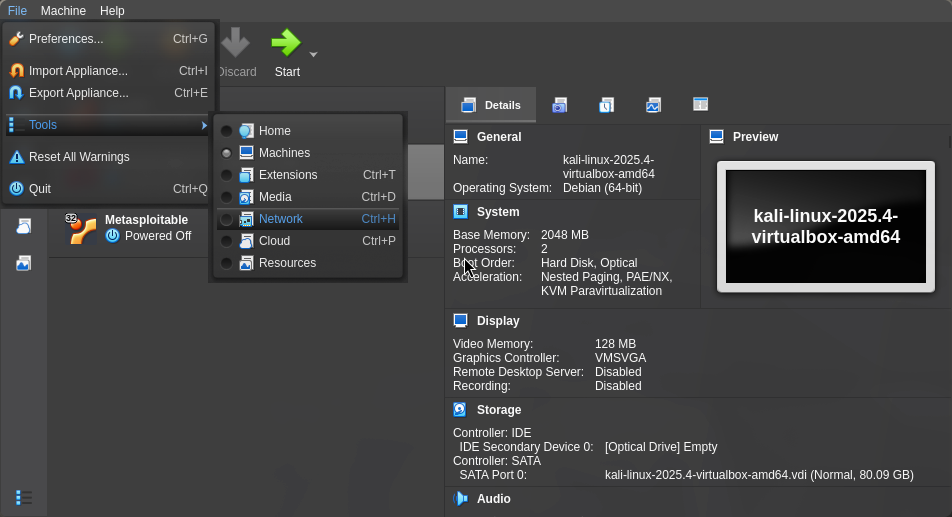 Figure: Opening the Network Manager in VirtualBox
Click Create to add a new Host-only network.
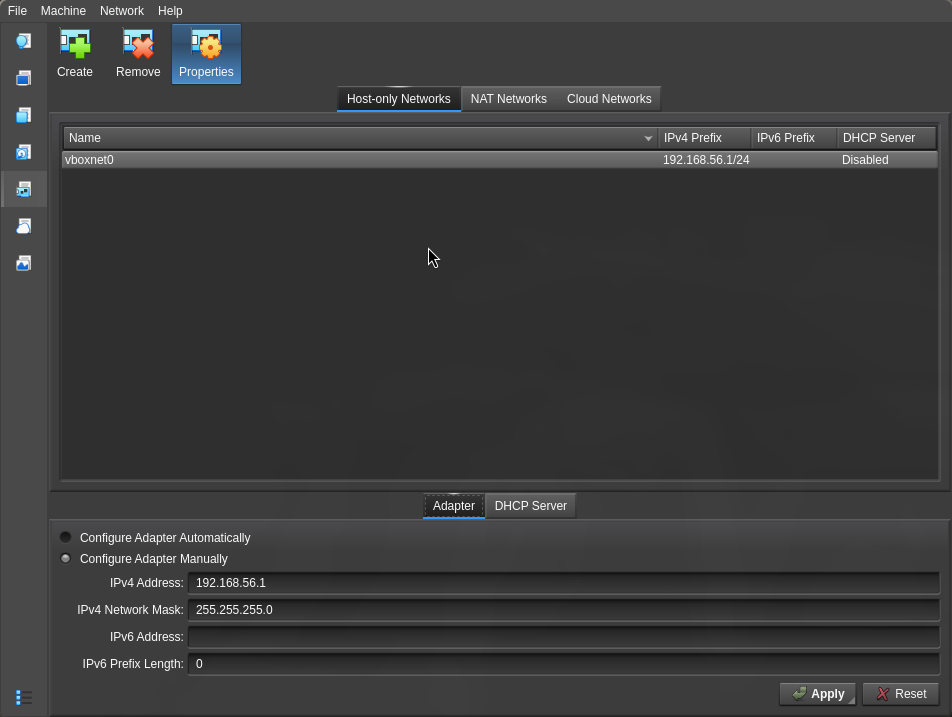 Figure: Creating a new host-only network
In the Properties section, click DHCP Server and enable it.
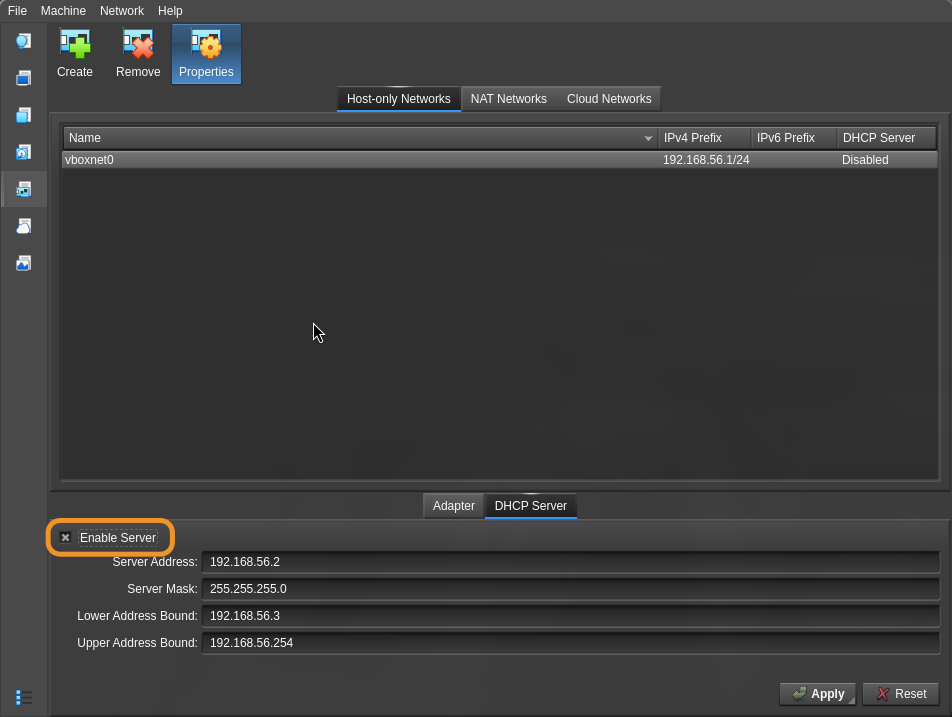 Figure: Enabling the DHCP server on the host-only network
This creates a network accessible only to the VMs on your system — not the public internet.
Step 2: Add the Network to Each Machine
Select a machine, open Settings, switch to Expert Mode, and go to the Network section.
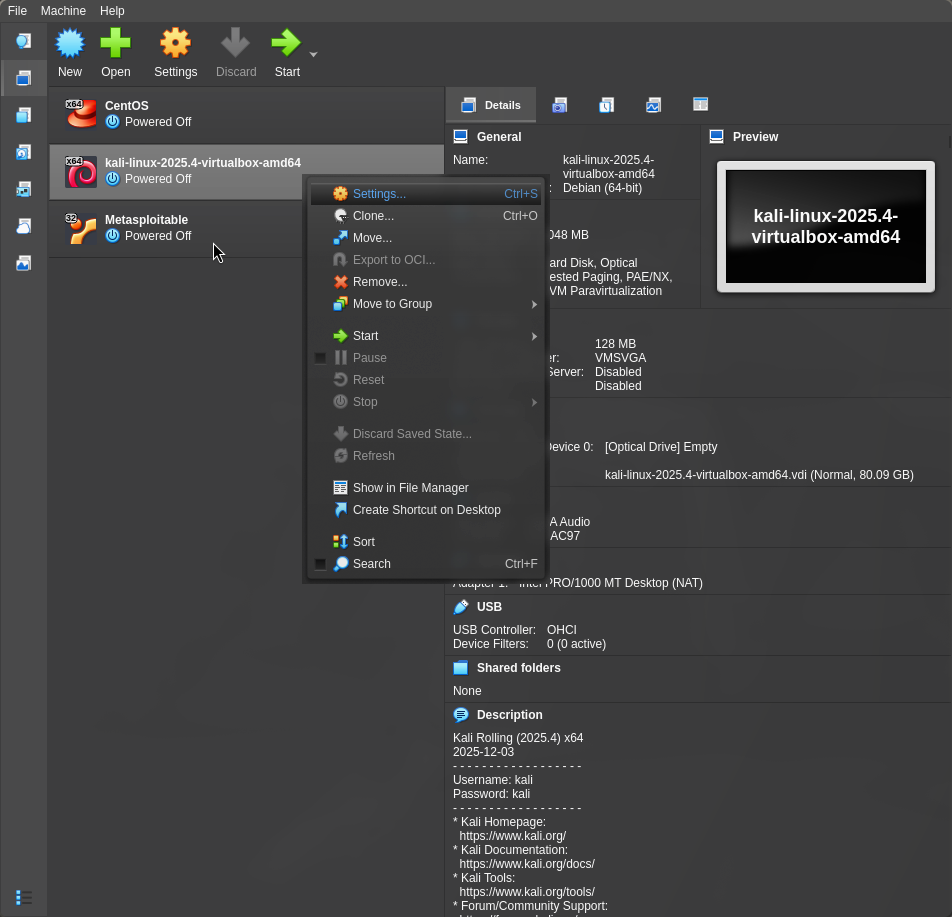 Figure: Opening network settings for the VM
Click Adapter 2, check Enable Network Adapter, and set Attached to → Host-only Adapter.
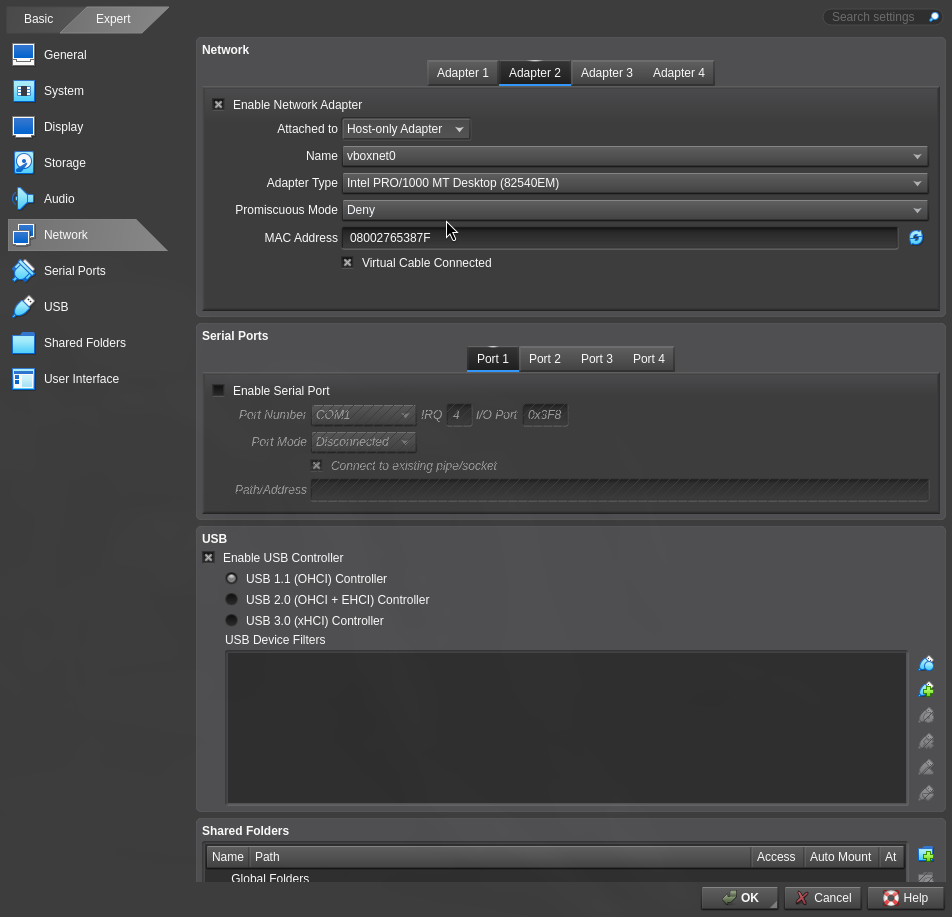 Figure: Configuring Adapter 2 as a host-only adapter
Click OK. Repeat this step for the target machine.
Step 2.5: Configure DHCP on the Target Machine
Inside Metasploitable, run:
sudo dhclient eth1
This tells the eth1 interface (Adapter 2) to request an IP address via DHCP, enabling communication with other machines on the host-only network.
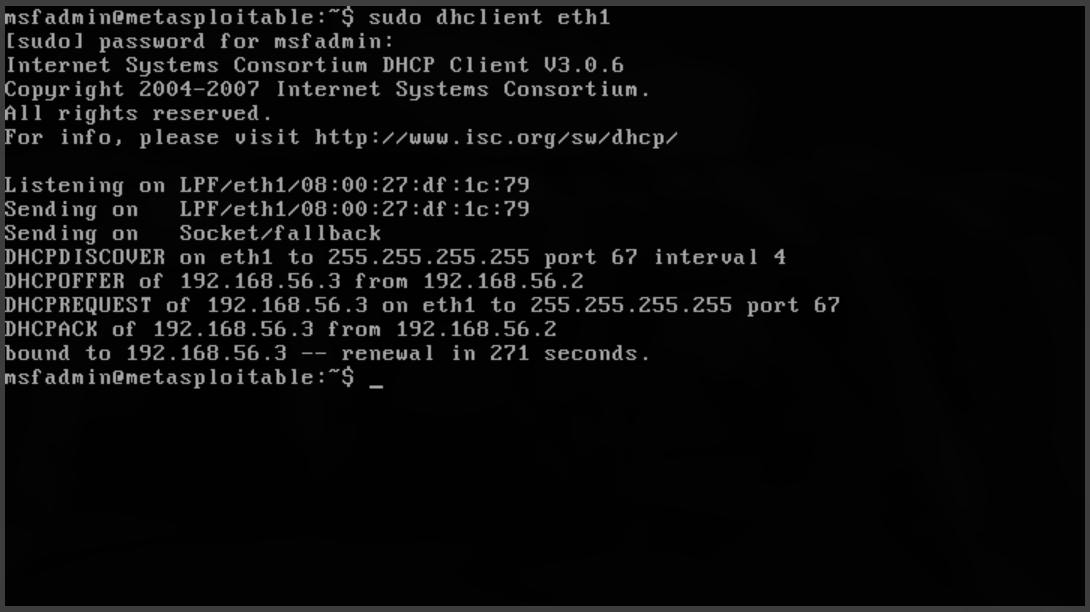 Figure: Running dhclient to obtain an IP address
Verify the setup with:
ifconfig -a
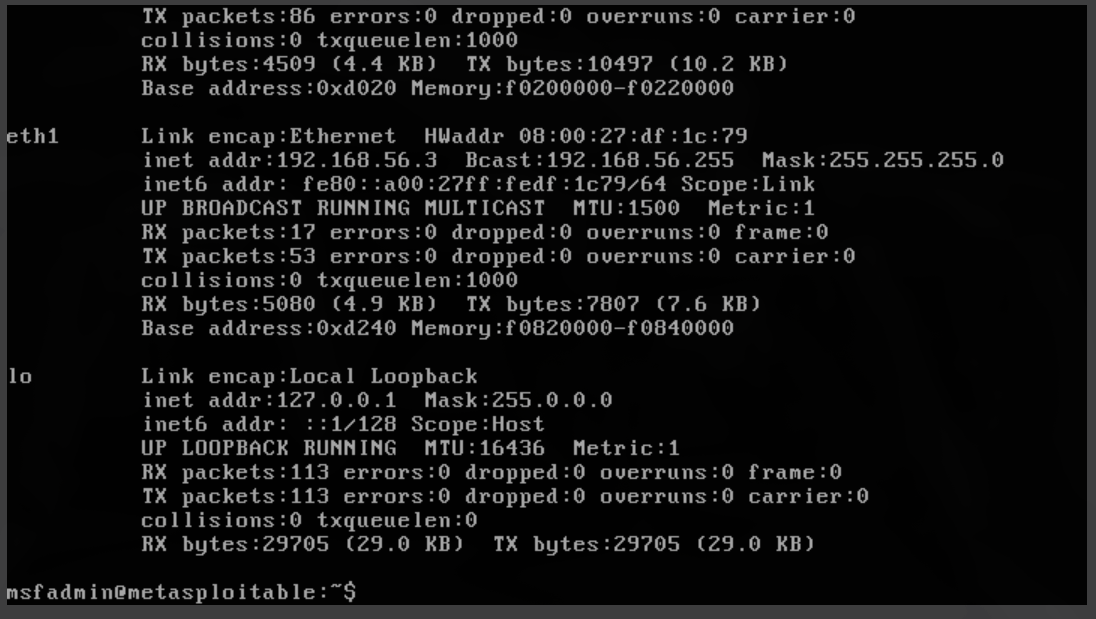 Figure: eth1 interface showing the assigned IP address (192.168.56.3)
The IP address is now assigned — the target machine is connected to the internal lab network and ready to be accessed from the attack machine.
Done!
The network is set up and the target machine is reachable from Kali.
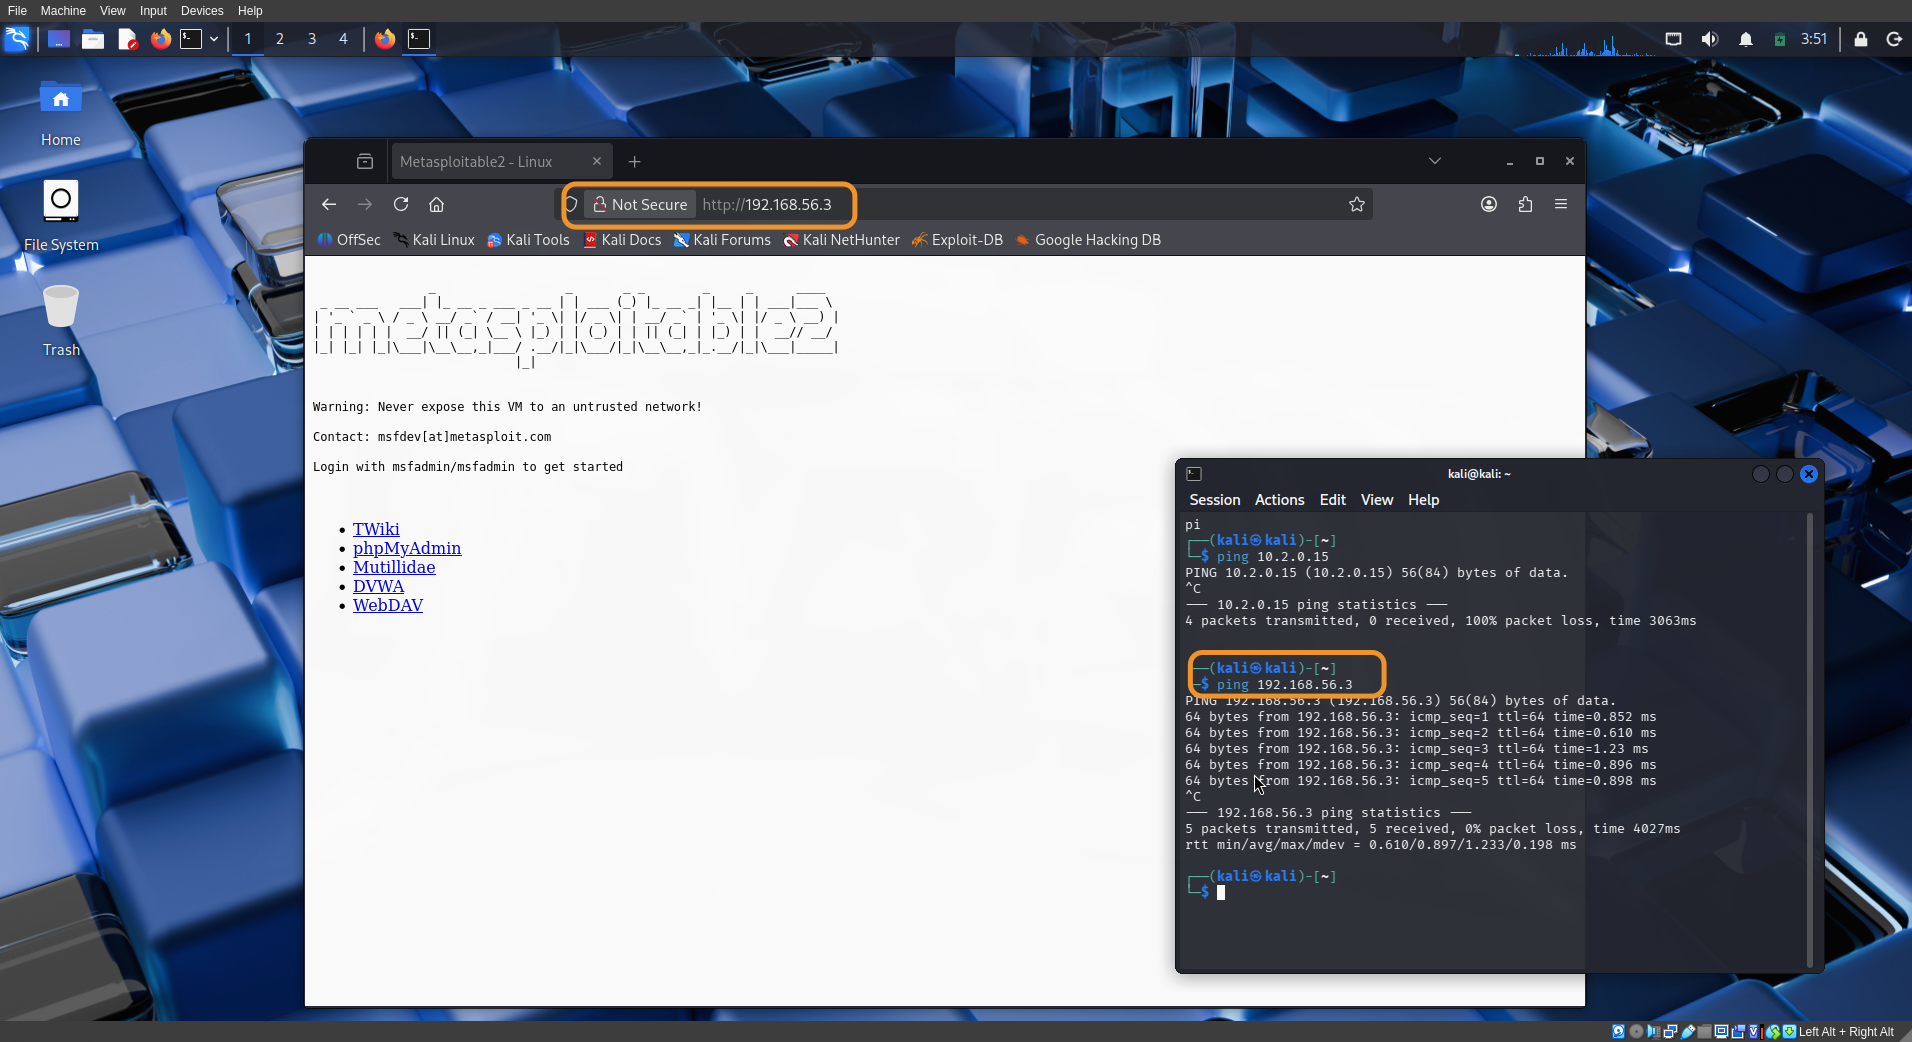 Figure: Successfully accessing Metasploitable 2 from the Kali attack machine
You can now attack the target machine freely without any risk to external systems. This lab gives you full freedom to hone your skills.
Happy Hacking!